If you want to update the firmware of the ViewSonic M1+projector, you can do as follows.
- Enter “Downloads” > ”Driver & Software” by searching M1+, then you can download the latest firmware version.
- Unzip the downloaded files and copy the Firmware files, “MstarUpgrade.bin” and “M1+WW.bin” to a FAT32 formatted USB drive.
- Power on the projector.
- Plug in the USB drive with the new Firmware.
- The projector will automatically detect the Firmware files and a Firmware update notification will pop up.
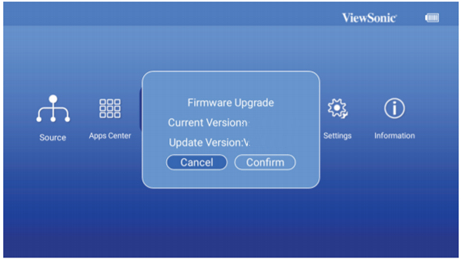
- Click “Confirm”.
- A progress bar will appear.
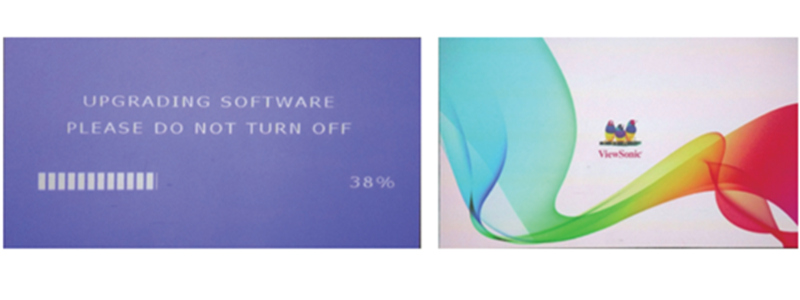
- After reaching 100%, the projector will return to the ViewSonic start up screen for loading again.
- The whole upgrading process will take around 5~10 mins.
- After the process is completely finished, the projector will return to the Homepage.
Related Posts:
How to Reset ViewSonic Projectors to Factory Default?
How to Fix Pixelated Images Problem of ViewSonic Projector?