If you want to make a PowerPoint presentation using VANKYO Leisure 3, you need to connect the projector to the projector. Here are two methods to connect the projector to a computer.
Method 1: HDMI Connection
This method is suitable for projecting slides, videos, music, and so on.
Step 1: Turn on your computer and VANKYO Leisure 3.
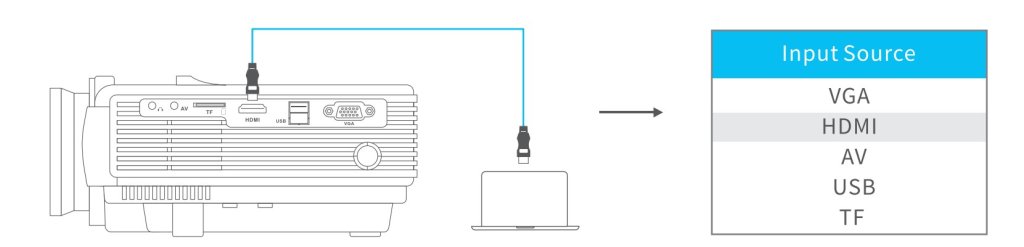
Step 2: Connect the HDMI cable to your computer’s HDMI port.
Step 3: Connect the other end to the HD port on the projector.
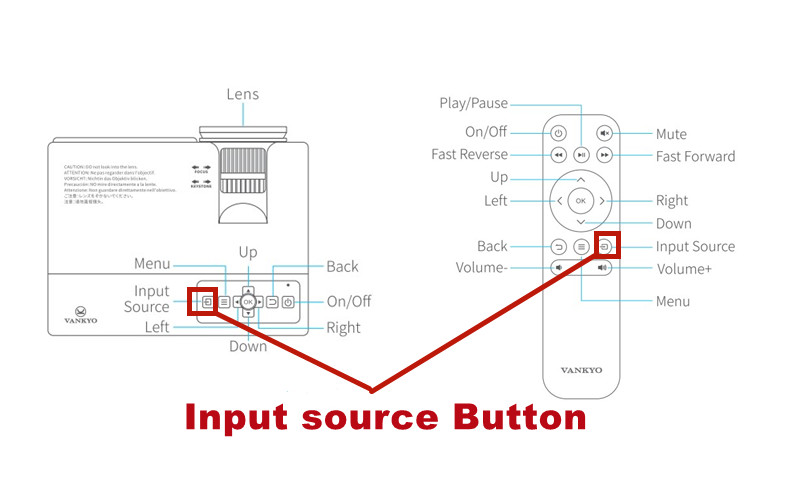
Step 4: Press the Input Source button to bring up the Input Source menu.
Step 5: Select HDMI to project any files on your computer by pressing the Up/Down or the Input Source button.
Method 2: VGA Connection
Step 1: Turn on your computer and the projector.
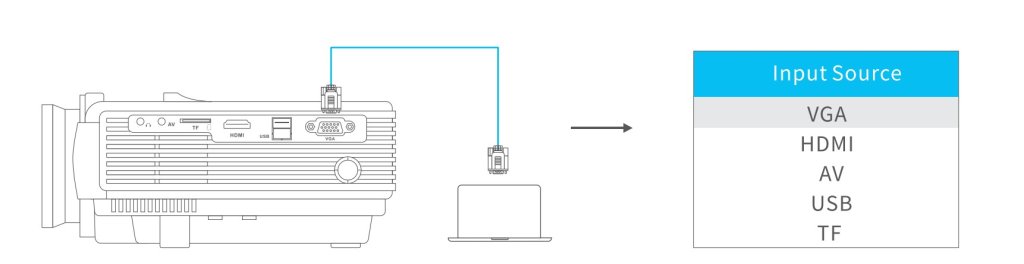
Step 2: Connect the VGA cable to your computer’s VGA port.
Step 3: Connect the other end to the VGA port on your projector.
Step 4: Press the Input Source button to bring up the Input Source menu.
Step 5: Select VGA to project any file on your computer by pressing the Up/Down or the Input Source button.
Tips:
(1) For computers with Windows 7 system and higher versions, you can press the Windows key + P key simultaneously to invoke a display-switch toolbar with various display options shown below:
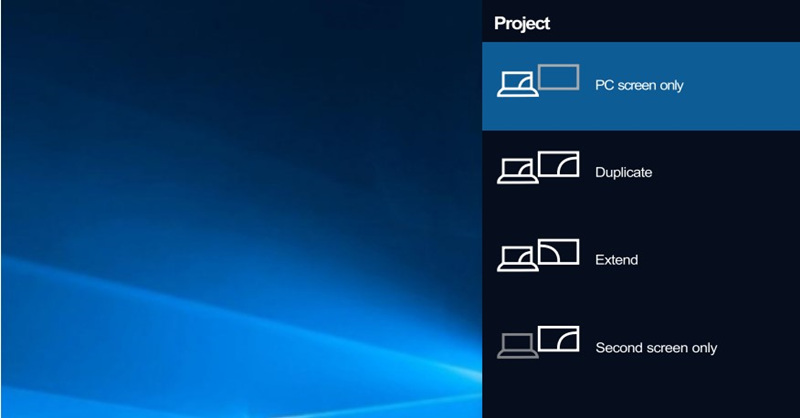
- PC screen only -This option displays the contents of your computer screen on the computer only.
- Duplicate – This option simultaneously displays the contents of the computer screen on the computer screen and through the projector.
- Extend – This option splits the image between the computer and the projector.
- Projector Only (Second Screen Only) – This option will display the content of your presentation on the projector, but show a blank screen on your computer.
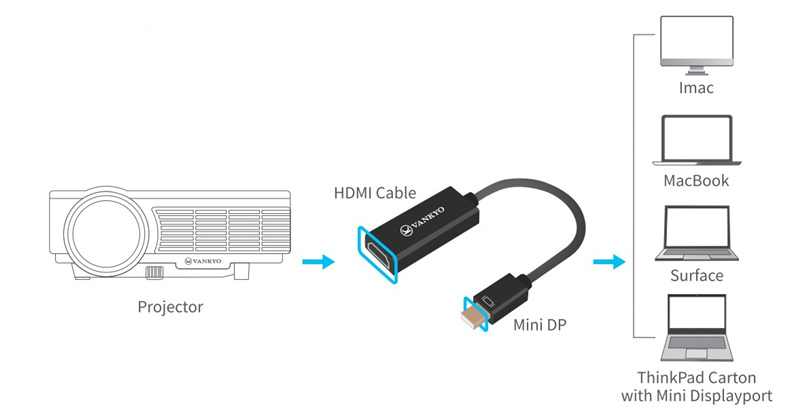
(2) To connect a Mac/Surface that includes only a Mini DisplayPort, Thunderbolt port, or Mini-DVI port, you need to obtain an adapter that allows you to connect to the projector’s HDMI or VGA port.
For MAC System
For the Mac system, Choose the Apple menu > System Preferences> Displays>Arrangement tab to check/uncheck the Mirror Display box to extend or mirror the content to the projection screen.
That’s all for the two methods to Connect VANKYO Leisure 3 to a computer.
Related Posts
VANKYO Leisure 3 Chromecast Connection Method
How to Connect VANKYO Leisure 3 Projector to Fire TV Stick?
VANKYO Leisure 3 Mini Projector Brief Review
How to Connect VANKYO Leisure 3 Projector to iPhone?