Most projectors on the market don’t have a direct screenshot button, but you can take a screenshot on the projector by means of connecting a keyboard. Here are the detailed steps.
- Get a keyboard; you can just use the independent keyboard of your PC.
- Connect the keyboard to your projector via the USB interface on your projector.
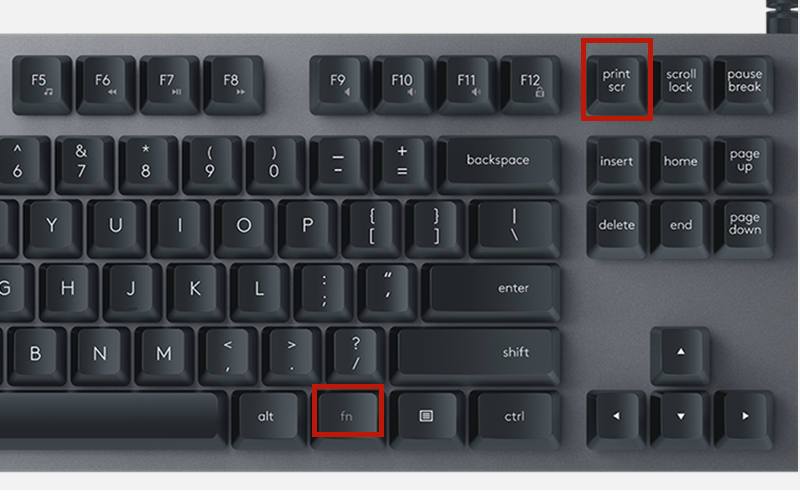
- Press the Print Screen button on the keyboard.
- Then, you can copy the screenshot picture (generally stored on the local Files Folder) by means of a USB flash drive.
This guide is applicable to most projectors on the market, but the operation may be slightly different on different keyboards or projectors.
You can try to press the “FN+ Print Screen” combination key simultaneously or the “CTRL + Print Screen” combination key if the guide doesn’t work for your projector.
Related Posts
Dangbei Mars Pro ScreenShot Guide and Method
Samsung The Freestyle Keyboard Connection Guide
Projector Photography: 6 Tips to Take Creative Photos 2022
Projector Throw Ratio: All Things You Should Know